Setting up a Jekyll 4.x site with Tailwind CSS on GitHub Pages is a bit different from the usual GitHub Pages deployment. You’ll need a custom deployment workflow, but don’t worry, it’s not too complicated!
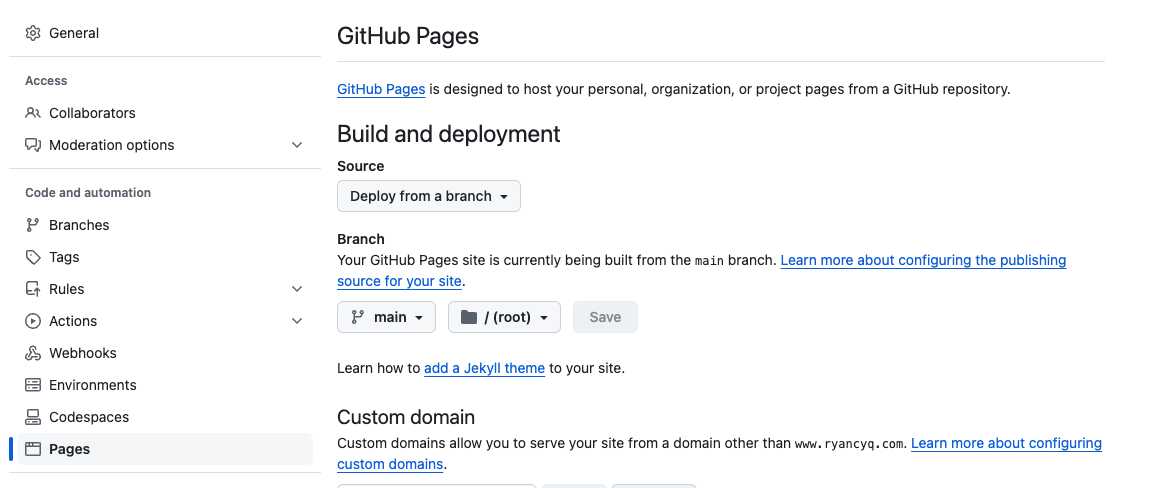
For personal blogs, most folks deploy from the main branch with the root folder, while project websites might deploy from a separate branch like gh-pages with a doc folder in the root. Check out GitHub Pages deployment for more details.

Once you’ve got the basic setup, you might want to add some cool 3rd party libraries to enhance your website. GitHub Pages is powered by Jekyll and has a safelist of supported Ruby gems. See GitHub Pages dependencies for the list.
At the moment, GitHub Pages supports only up to Jekyll 3.x, but there are plenty of reasons to upgrade to Jekyll 4.x. Plus, there are many awesome 3rd party libraries that aren’t on the safelist.
Deploy Custom Jekyll Build Pipeline
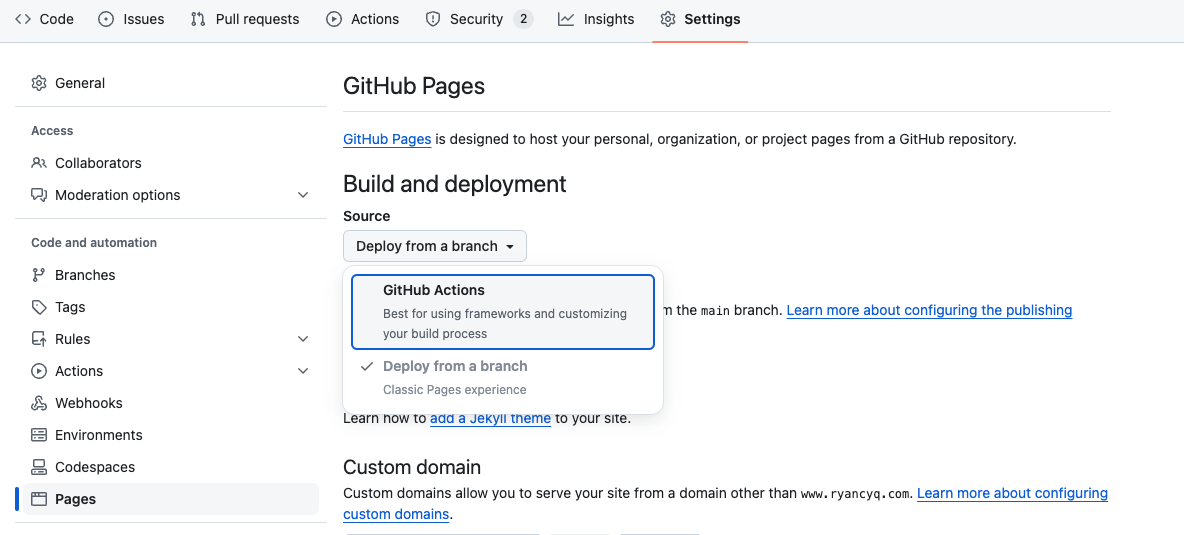
To get around this, we can set up a GitHub Actions workflow to bypass the default deployment pipeline offered by GitHub Pages. The official Jekyll documentation on GitHub Actions explains the benefits of using a GitHub Actions workflow.
This way, we can add dependencies like Tailwind CSS, a super popular utility-first CSS framework that makes your website look amazing with minimal effort.
Prerequisites
Make sure you have a working Jekyll + Tailwind CSS setup on your machine. See my post on Jekyll and Tailwind CSS setup guide.
Step 1: Ensure Gemfile.lock Supports the OS on GitHub Actions
We usually use the ubuntu OS image in GitHub Actions. To make sure bundler can install the dependencies with ubuntu, your Gemfile.lock should have x86_64-linux under PLATFORMS.
If not, you can add it with this command:
bundle lock --add-platform x86_64-linux
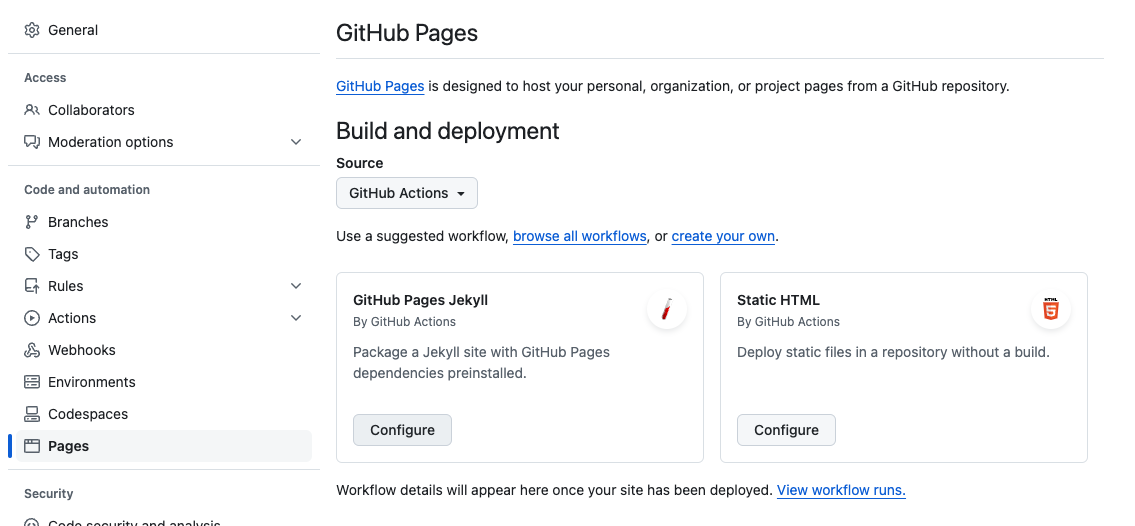
Step 2: Select Page Deployment Approach
Following the Jekyll documentation on GitHub Actions, your configuration will look something like this:

Click on Configure under GitHub Pages Jekyll workflow.

Step 3: Create a GitHub Actions Workflow
When creating the workflow, you’ll need to tweak the default template a bit:
# jekyll.yml
name: Deploy Jekyll site to Pages
# ... more

jobs:
  build:
    runs-on: ubuntu-latest
    steps:
      - name: Checkout
        uses: actions/checkout@v4

      - name: Setup Ruby
        uses: ruby/setup-ruby@v1 # replaced with major version to get latest updates
        with:
          ruby-version: "3.3" # or create a .ruby-version
          bundler-cache: true

      - name: Setup Pages
        id: pages
        uses: actions/configure-pages@v5

      - name: Build with Jekyll
        run: bundle exec jekyll build --baseurl "${{ steps.pages.outputs.base_path }}"
        env:
          JEKYLL_ENV: production

      - name: Upload artifact
        uses: actions/upload-pages-artifact@v3
For reference, see the official actions/build-jekyll-for-github-pages.
Step 4: Add Node.js Setup for TailwindCSS
Include Node.js setup and install JavaScript dependencies with:
# jekyll.yml
name: Deploy Jekyll site to Pages
# ... more

jobs:
  build:
    steps:
      # ... more

      - name: Setup Ruby
        # ... more

      - name: Setup Node
        uses: actions/setup-node@v4
        with:
          node-version: 20 # any node version would do, preferably an LTS version
      - name: Install Tailwind CSS dependencies
        run: npm install

      - name: Setup Pages
        # ... more
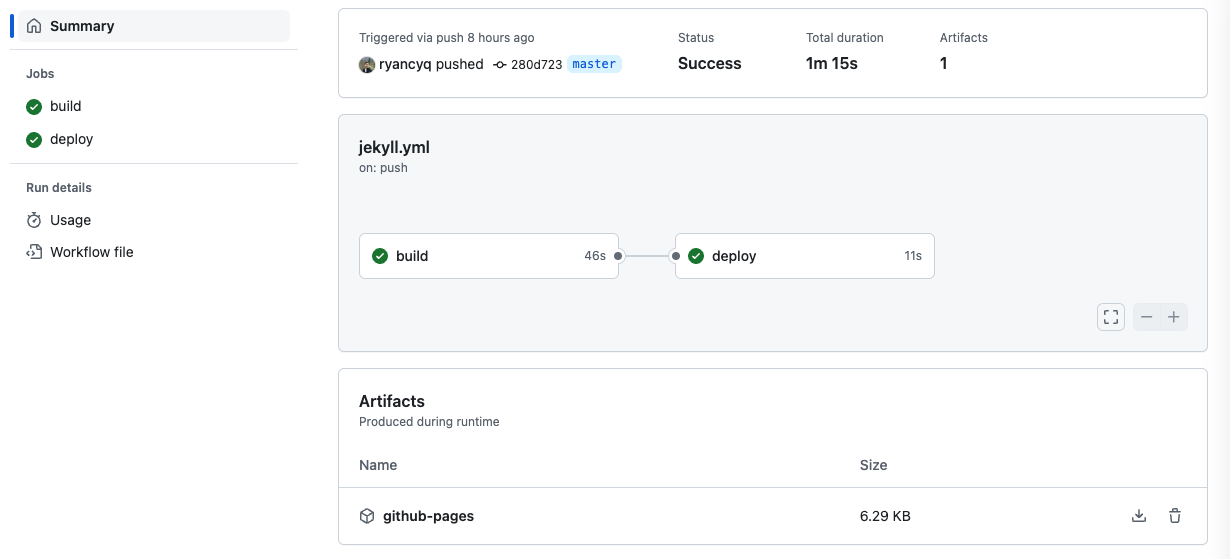
Step 5: Push and Deploy
After all these steps, you should see a successful build like this:

And that’s it! You’ve now set up a Jekyll site with Tailwind CSS and deployed it using GitHub Actions. With this setup, you can take full advantage of Jekyll 4.x and any other dependencies you want to include!